So you’ve got your domain name, you’ve picked a hosting plan, and now you’re staring at your hosting dashboard wondering what to do next. Trust me – I’ve been there. Installing WordPress for the first time can feel intimidating, but once you do it, you’ll realize it takes less than five minutes.
In this guide, I’ll show you how to install WordPress on any hosting platform, walking you through the entire process based on my experience from the first click to logging into your brand-new WordPress dashboard. I’ll also cover the manual installation method for those using more advanced or custom hosting environments.
Let’s get into it.
Table of Contents
What You’ll Need Before You Start (Prerequisites)
Before touching anything, make sure you have the following ready:
- A domain name – Something like
yourbrand.com. You should have purchased this already. - A hosting account – Shared hosting (like Hostinger, SiteGround, or Bluehost) is perfect for beginners. VPS or cloud hosting works too.
- Access to your hosting control panel – Usually cPanel or a custom dashboard provided by your host.
- An email address – You’ll need it for your WordPress admin account.
💡 Pro tip: If your domain and hosting are with two different providers, make sure your domain’s nameservers are already pointing to your hosting provider. This can take up to 48 hours to propagate, so sort it out first.
Method 1: One-Click WordPress Installation (Recommended for Beginners)
This is the method I recommend to 99% of my clients. Every major hosting provider offers this, and it genuinely takes under 5 minutes.
Step 1: Log Into Your Hosting Control Panel
Head to your hosting provider’s website and log in. You’ll be taken to either:
- cPanel (the most common – looks like a grid of icons), or
- A custom dashboard (Hostinger uses hPanel, SiteGround has its own interface)
Step 2: Find the WordPress Installer
Inside your dashboard, look for one of the following:
- Softaculous Apps Installer (most common on cPanel hosts)
- WordPress Manager (Hostinger, WP Engine)
- WordPress icon directly (SiteGround, Bluehost)
Click it.
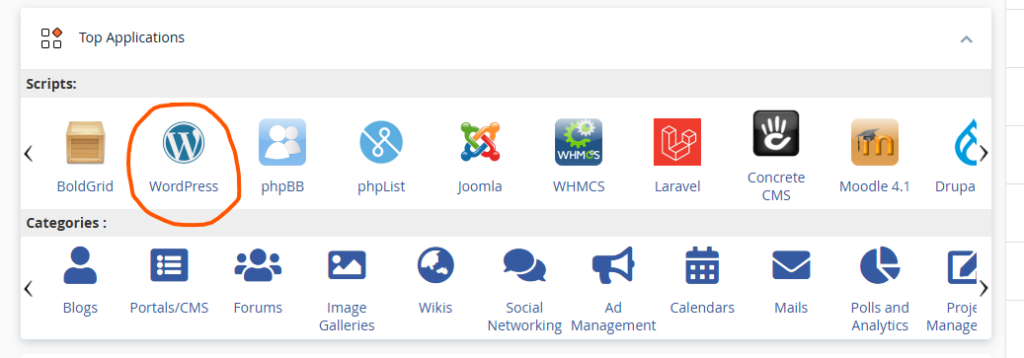
💡 Pro tip: If you can’t find the installer, use the search bar in cPanel. Just type “WordPress” and it’ll show up immediately.
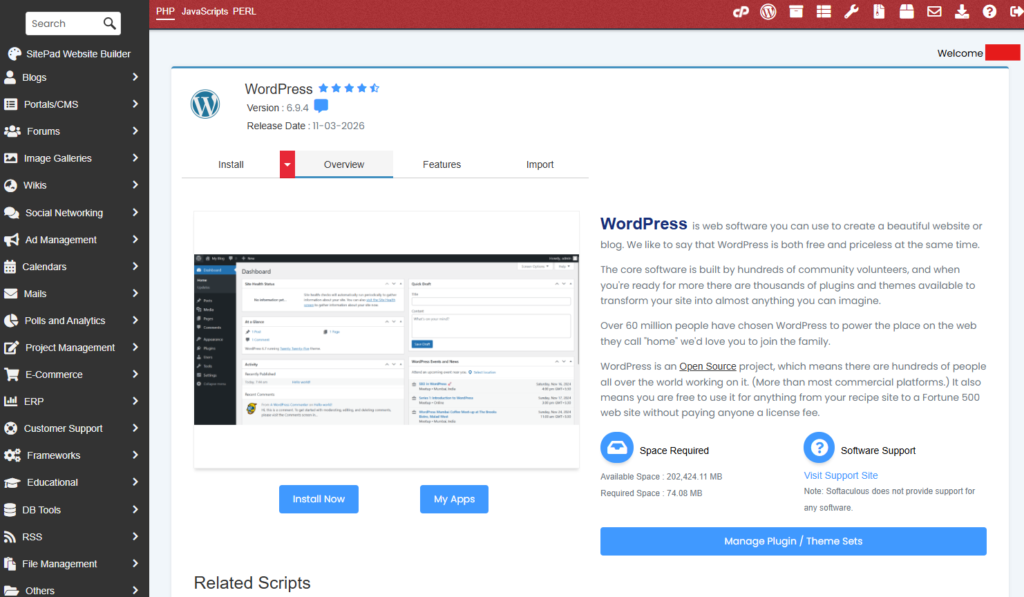
Step 3: Click “Install Now”
You’ll land on the installer’s overview page. Hit “Install Now” or “Quick Install” – don’t overthink it at this stage.
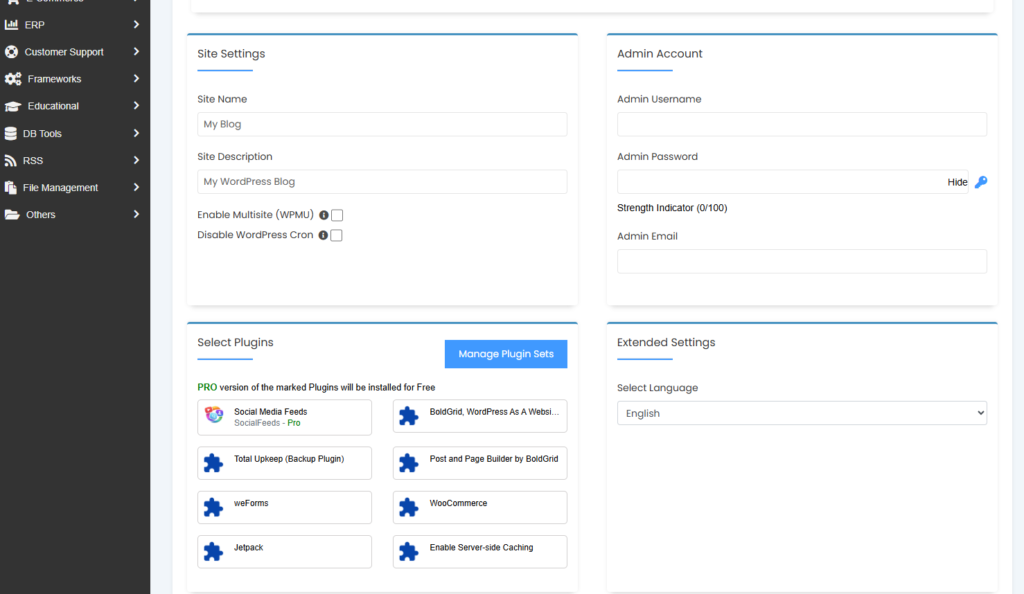
Step 4: Fill In the Installation Details
This is the important part. You’ll see a form with a few fields:
Under “Software Setup”:
- Choose Protocol: Select
https://if you have an SSL certificate (you should – most hosts give it free). Otherwise, usehttp://. - Choose Domain: Select your domain from the dropdown.
- In Directory: Leave this field blank unless you want WordPress installed in a subfolder (like
yourdomain.com/blog). If you want it at the root – which most people do leave it empty.
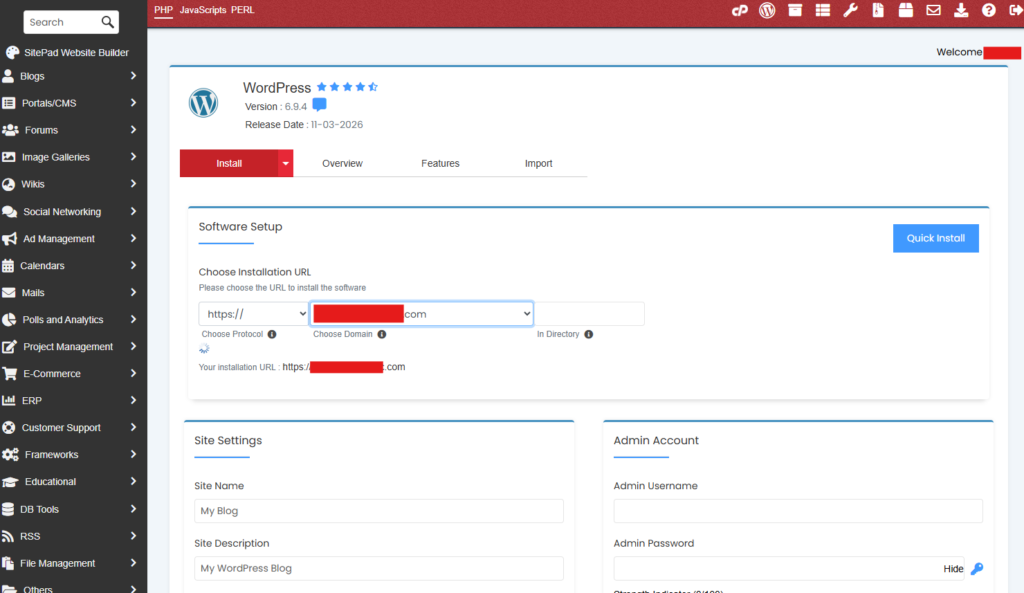
Under “Site Settings”:
- Site Name: Enter your website’s name. You can always change this later.
- Site Description: A short tagline. Again, changeable anytime.
Under “Admin Account”:
- Admin Username: Don’t use
admin. Seriously. It’s the first thing bots try. Use something likejohn_managesor your brand name. - Admin Password: Use a strong password. I usually generate one with a password manager and store it securely.
- Admin Email: Use a real email you check regularly this is where password resets go.
💡 Pro tip: Uncheck the “Limit Login Attempts” or “Enable Auto Upgrade” options if you plan to manage updates manually. Auto-upgrades can sometimes break plugins if they’re not tested first.
Step 5: Hit Install
Scroll down and click the Install button. The installer will take 30–60 seconds to run.
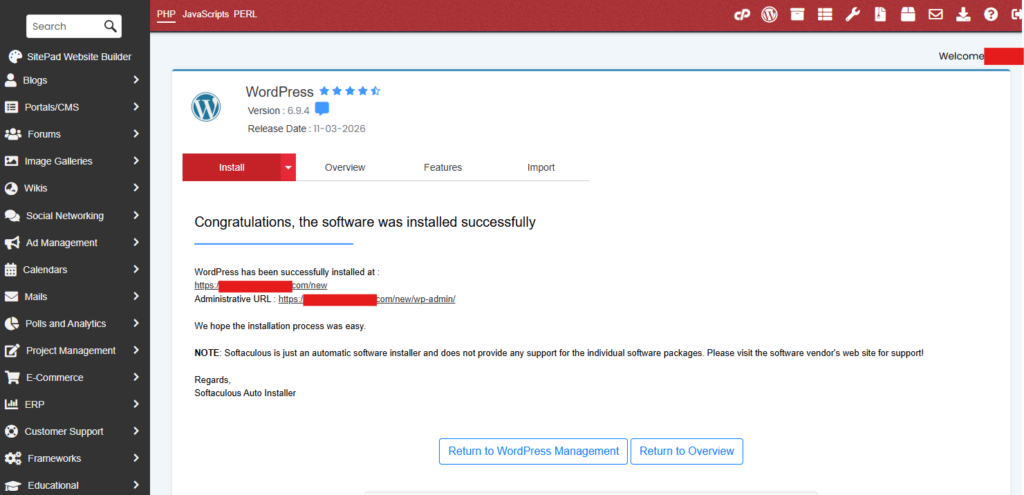
Once done, you’ll see a success message with two important URLs:
- Your site URL:
https://yourdomain.com - Your admin login URL:
https://yourdomain.com/wp-admin
Bookmark that second one. You’ll use it constantly.
Step 6: Log Into Your WordPress Dashboard
Go to https://yourdomain.com/wp-admin, enter the username and password you set, and click Log In.
Welcome to WordPress. 🎉
Method 2: Manual WordPress Installation (For Advanced Users)
If you’re on a VPS, a custom server, or your host doesn’t offer a one-click installer, you’ll need to install WordPress manually. It takes a bit more effort, but it’s not as scary as it sounds.
Here’s a quick overview of the steps:
Step 1: Download WordPress
Go to wordpress.org/download and download the latest .zip file.
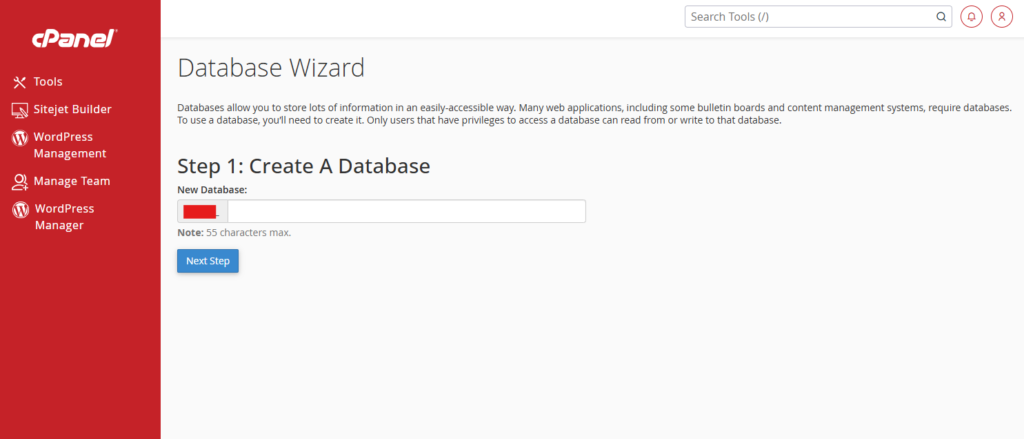
Step 2: Create a MySQL Database
In cPanel, open MySQL Databases. Create:
- A new database (e.g.,
site_db) - A new database user with a strong password
- Assign the user to the database with All Privileges
Write these three things down you’ll need them shortly:
- Database name
- Database username
- Database password
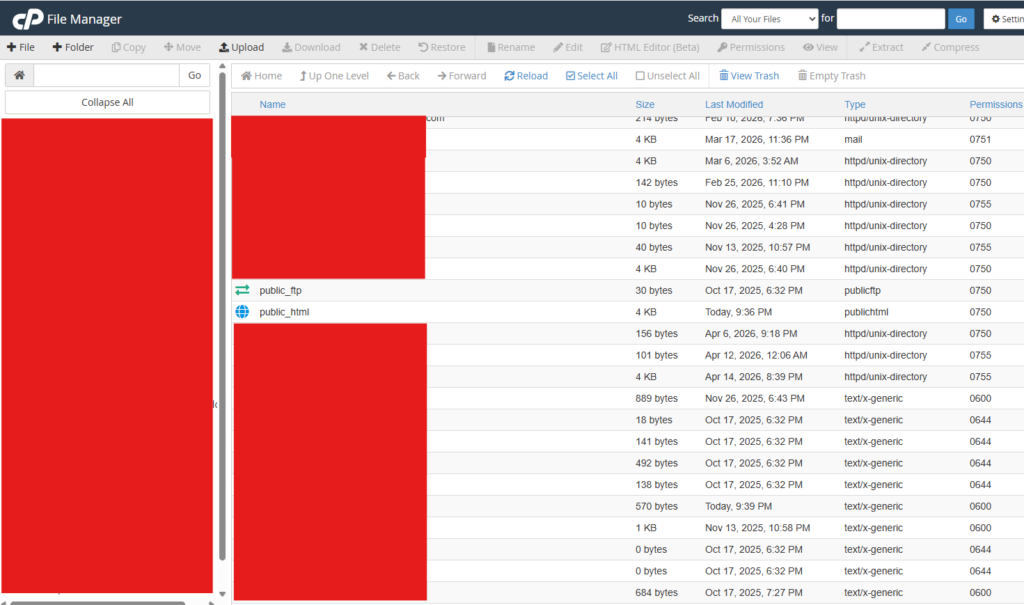
Step 3: Upload WordPress Files
Using File Manager (in cPanel) or an FTP client like FileZilla:
- Extract the WordPress
.zipfile - Upload the contents of the
wordpressfolder into yourpublic_htmldirectory (or a subdirectory if needed)
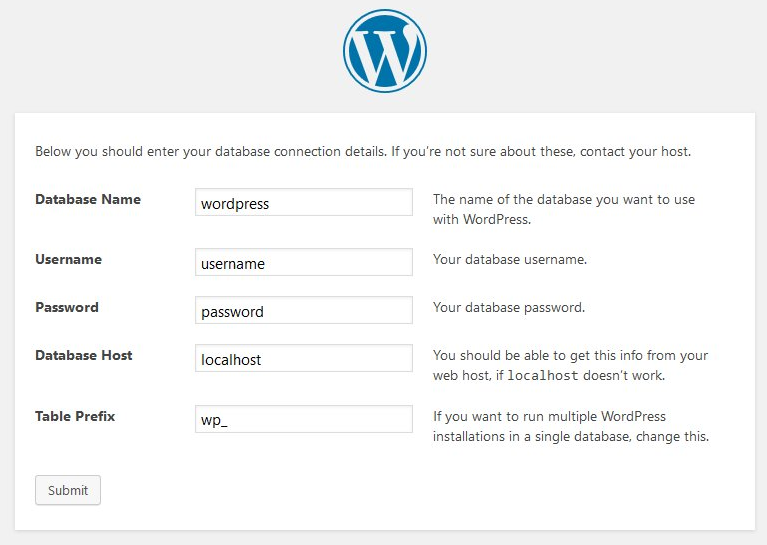
Step 4: Run the WordPress Installer
Navigate to your domain in a browser. You’ll see the WordPress setup wizard.
- Select your language
- Enter your database name, username, password, and host (usually
localhost) - Click Run the Installation
- Fill in your site title, admin credentials, and email
- Click Install WordPress
That’s it. You’re done.
💡 Pro tip: After uploading your files, check that the file permissions on
wp-config.phpare set to644, not777. Wrong permissions are a common security vulnerability that beginners overlook.
What to Do After Installing WordPress
Installation is just the beginning. Here’s what I always do immediately after setting up WordPress for a client:
1. Delete the Default Content
WordPress comes with a sample post (“Hello World”), a sample page, and a default comment. Delete all three – they have no place on a real website.
2. Set Your Permalink Structure
Go to Settings → Permalinks and choose “Post name” (/your-post-title/). This is the most SEO-friendly option and the one I use on every project.

3. Install an SSL Certificate (If You Haven’t)
If your site is still running on http://, go to your hosting dashboard and activate the free Let’s Encrypt SSL certificate. Then install a plugin like Really Simple SSL to redirect traffic automatically.
4. Install Essential Plugins
At minimum, you’ll want:
- A security plugin – Wordfence or Solid Security
- An SEO plugin – Rank Math or Yoast SEO
- A caching plugin – WP Rocket or W3 Total Cache (for speed)
- A backup plugin – UpdraftPlus
You can go through the top essentials plugin list here.
💡 Pro tip: Keep your plugin list lean. I’ve seen websites with 40+ plugins that load like molasses. Every plugin adds overhead – only install what you genuinely need.
5. Choose and Install a Theme
Go to Appearance → Themes → Add New and search for a theme. For beginners, I recommend Astra or Kadence – both are lightweight, well-coded, and free.
6. Change the Default Admin Email
Go to Settings → General and make sure the admin email is one you actively monitor. WordPress sends important notifications to this address.
7. Set Up Basic Security
- Change your login URL using a plugin like WPS Hide Login
- Enable two-factor authentication
- Disable XML-RPC if you don’t need it
Frequently Asked Questions (FAQ)
Can I install WordPress for free?
WordPress itself is completely free to download and use. You’ll need to pay for hosting (which can start at around $2–$5/month) and a domain name (usually $10–$15/year). Some hosts bundle a free domain with their plans.
What if I make a mistake during installation – can I start over?
Yes, absolutely. Most one-click installers let you reinstall WordPress on the same domain. In Softaculous, you can go to your installations, delete the existing one, and start fresh. Just be aware that reinstalling will delete everything on that install – so don’t do it on a live site with real content unless you have a backup.
Is there a difference between WordPress.com and WordPress.org?
Yes, and it’s an important one. WordPress.org is the self-hosted version – the one this guide covers – where you own your site completely and have full control. WordPress.com is a hosted service where WordPress manages the server for you, but you’re limited in terms of plugins, themes, and customization on the free and lower-tier plans. For most websites and businesses, WordPress.org is the better choice.
Conclusion
Installing WordPress isn’t as complicated as it might seem from the outside. With the one-click installer method, you can have a fully functional site up in under 10 minutes. The manual method takes a little longer, but it gives you full control – and once you’ve done it once, it becomes second nature.
The real work starts after installation: picking the right theme, configuring your plugins, and building out your content. But that’s a topic for another guide.
If you ran into any issues during installation, leave a comment below – I’m happy to help troubleshoot. And if this guide helped you, feel free to share it with someone who’s just starting their WordPress journey.